Screen printing (sometimes called silkscreening, or serigraphy) is a fantastic artistic technique which is especially useful for printing onto material. The process is easy, versatile and relativelycheap so everyone should give it a go! This article will help get you started.
Method 1 of 2: With a Screen & Squeegee
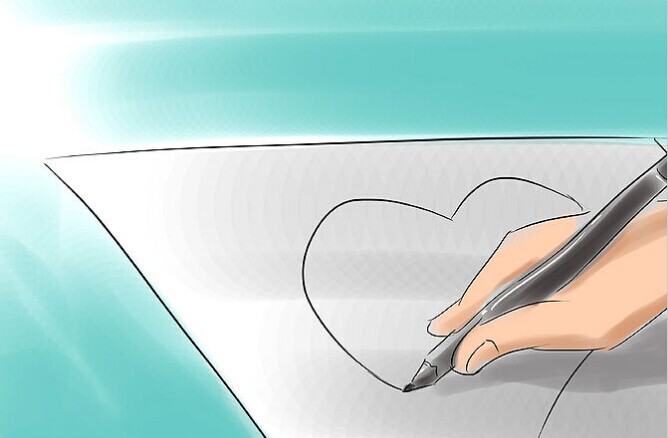
Design your print. Think of something interesting and draw it on to a piece of paper. Don't worry about coloring or shading it -- you'll be cutting it out and using the rest of it as a stencil.
- Keep it simple at first. Geometrical shapes and circles in an uneven pattern are easiest and never cliché. Space them far enough apart if you're a beginner -- you don't want the paper to tear when being cut.

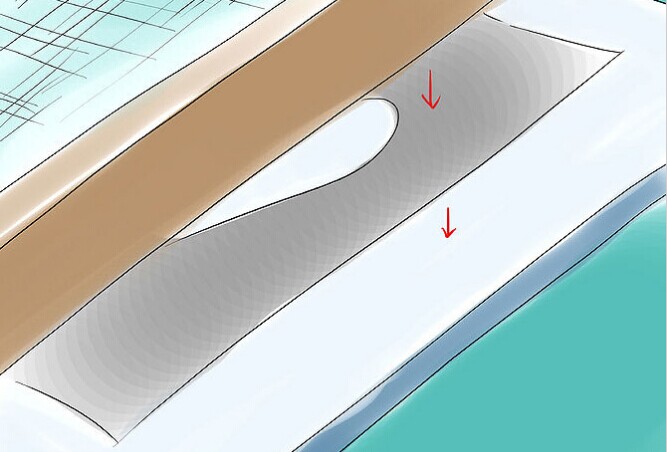
Use a craft knife to cut out all the coloured parts of your design. Keep the surrounding blank paper in tact. You have now made your stencil. Unfortunately, if it rips, you'll probably need to start over. Exercise care and precision.
- Make sure your stencil fits appropriately on your shirt. If it doesn't, you'll have to resize or otherwise adjust it.
Put your stencil on top of your material (paper or t-shirt) and the screen on top of the stencil. Place the stencil so the mesh is directly on top (the two should be touching) and the handles are facing up. If there is space between the edges of your stencil and the edges of your screen, put masking tape on the underside. You don't want paint leaking where it shouldn't leak.
- If you use the taping method, make sure not to tape the stencil to the mesh! Otherwise the stencil might move around when you're squeegee-ing it.
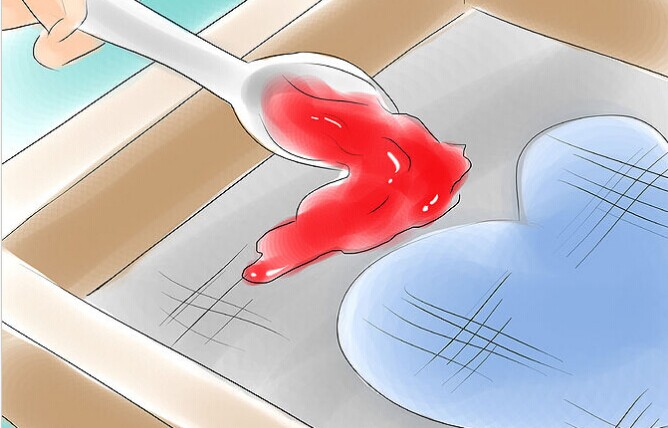
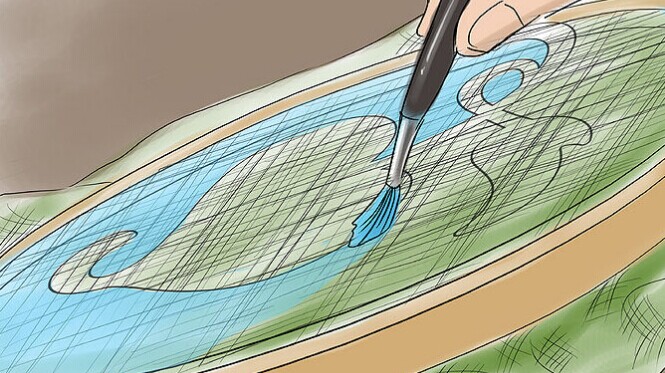
Spoon out some paint. Make a line at the top of the screen (the part furthest away from you). You don't want paint on top of the stencil at the moment. Try to spoon out as much paint as you think would cover the stencil.
- It's a little difficult to use more than one color with this method. If you do try it, know that at some point or other, the colors will mix. If you're okay with that, go for it!
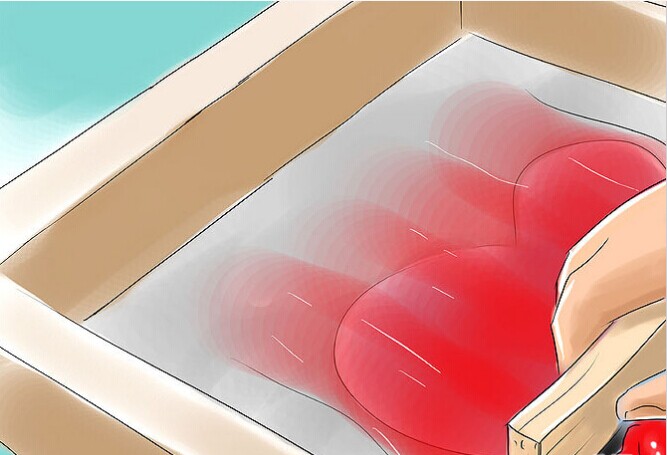
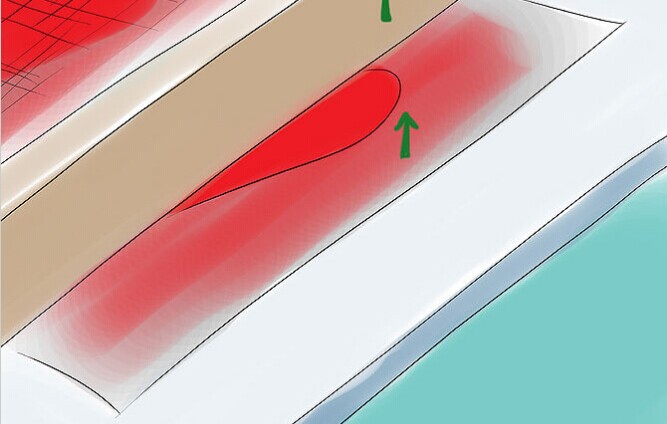
Use the squeegee to spread the paint over the mesh. Try to do it with one downwards movement -- or the least number of strokes possible. This makes it look as smooth and professional as can be.
- Always, always, always, make vertical strokes. If you make both horizontal and vertical strokes, the paint will clump and be harder to dry and finish.
- Once you reach the bottom, keep going and scoop the excess paint up the handle to be reused.
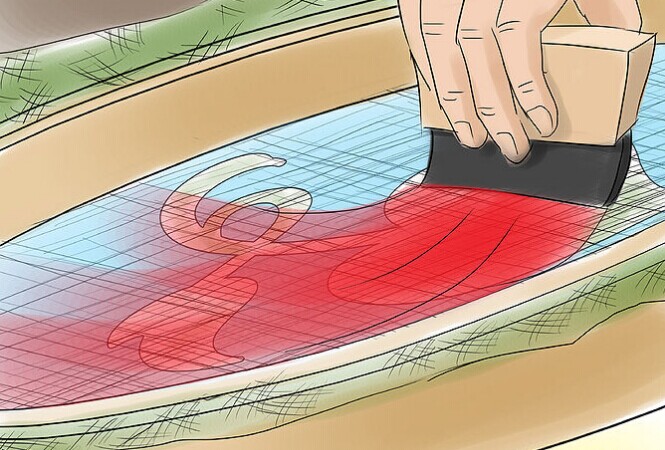
Lift everything up off your material. Be careful! If you drag it at all, the paint may smear. It's best to do it layer by layer, lifting up and then off.
- Leave to dry. The longer, the better.
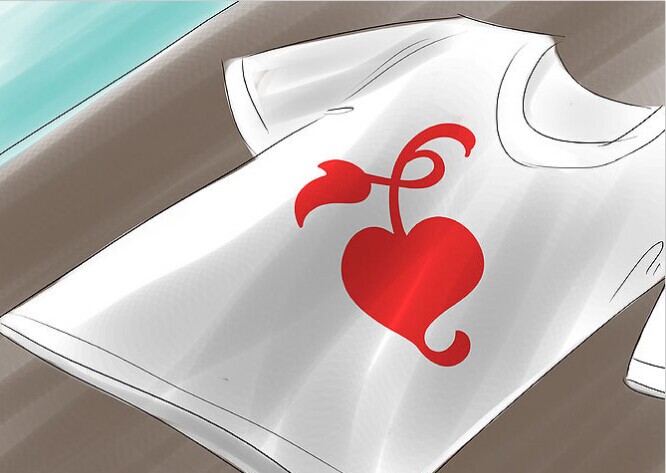
- If you printed onto clothing, then once it is dry you need to put a sheet of greasing or tracing paper over your design and iron it. This seals it, making it wearable and washable.
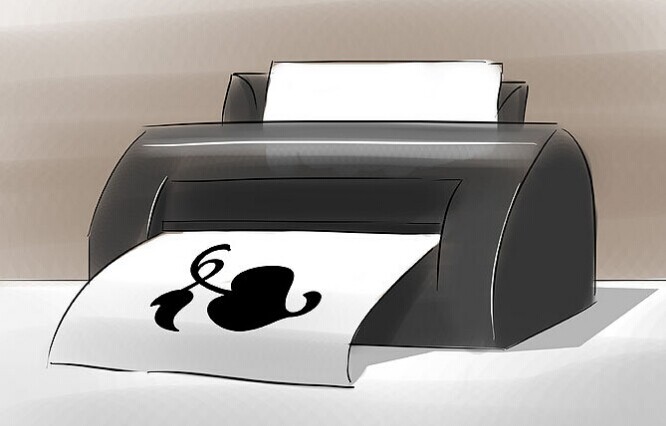
Print off your design on your computer. A big, dark, simple design is easiest to work with. Print in black and white or dark colors -- you need to see the pattern through the screen. It also has to fit inside your embroidery hoop.
- If you don't want to use your computer's imaging program, you can draw one yourself. Just make sure it's the right size, is dark enough, and won't transfer to your screen.
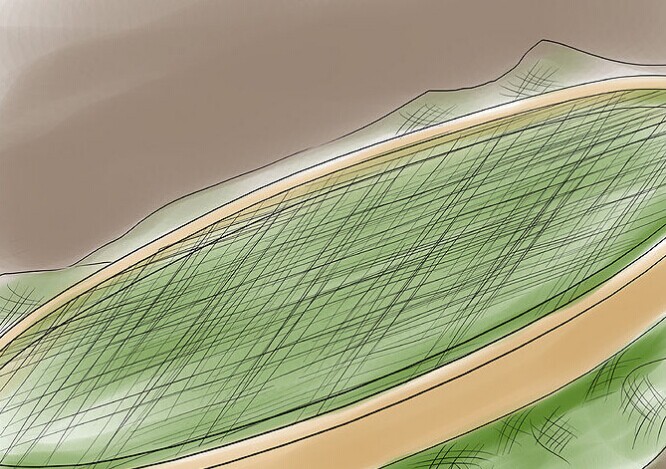
Place your sheer fabric material in an embroidery hoop. Unscrew the hoop that opens it and pull your fabric taut across the base of the hoop. Replace the top and twist the screw back in. It doesn't matter if it's centered; you'll only be using the material within the circumference of the hoop.
- Sheer curtain material works well as your screen. Pick a fabric that's meshy and not quite translucent.
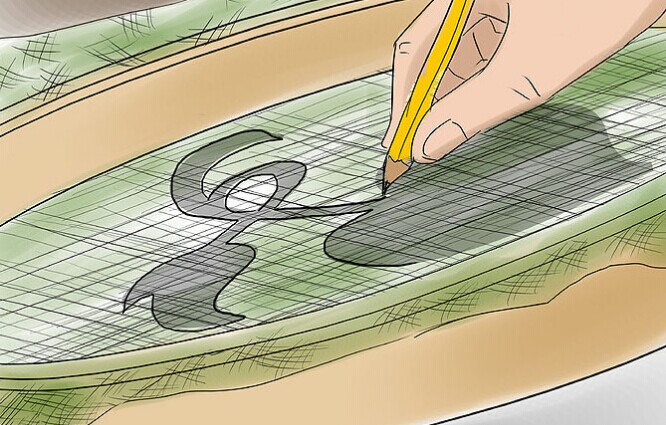
Place the hoop on top of the pattern and start tracing. The fabric should be directly touching the pattern. Use a pencil to trace your image; if you mess up, you can always go back and erase. Only trace an outline.
Flip the hoop fabric side up. Cover the outside of your pattern (where your tracing lines are) in a layer of glue. This should not be on your pattern; it should be surrounding it. This glue acts as a shield when you apply the paint -- if you go outside the lines, it won't show on the fabric; it'll just be left on the glue.
- The glue can go as crazy as it wants outside the pattern -- just make sure it doesn't go inside. When you're finished, wait for it to dry completely. 15 minutes should do the trick.
Position the screen in place. The sheer fabric should be away from the material, separated by the width of the embroidery hoop. Smooth out the fabric underneath the screen to create an even pattern.
- If you have an ink squeegee, use it to apply your paint to the material. If you don't, use a sponge paintbrush and hold the screen firmly.
Pull off the screen and allow your material to dry. Be careful that you don't incur any smudges when you lift it off! If it hasn't dried thoroughly, the paint may run. Give it a solid 15 minutes to dry completely.
- Iron your fabric, following the directions on the bottle of ink or paint you used. Wear away!
Contributed by WIKIHOW.COM